Android is one of the most flexible mobile operating systems in the world. One of its most powerful hidden features is Developer Options. While this menu is primarily designed for app developers, many everyday Android users also benefit from it. However, enabling Developer Options without understanding its functions can be risky. In this guide, we’ll explain how to enable Developer Options on Android safely, what it does, and which settings you should (and shouldn’t) change.
What Are Developer Options on Android?
Developer Options is a hidden settings menu in Android that provides advanced tools for debugging, performance tuning, and system behavior control. Google hides this menu by default to prevent accidental changes that could affect device stability, security, or performance.
Some popular features inside Developer Options include:
- USB Debugging
- OEM Unlocking
- Animation Scale Control
- Background Process Limits
- GPU Rendering Options
While these tools are powerful, they must be used responsibly.
Why Would You Need Developer Options?
You don’t have to be an app developer to use Developer Options. Many Android users enable it for legitimate reasons such as:
- Improving device performance
- Speeding up animations
- Connecting Android to a PC for debugging
- Unlocking bootloaders (advanced users)
- Testing apps or custom ROMs
That said, improper use can expose your phone to security threats or system errors.
How to Enable Developer Options on Android (Step-by-Step)
Enabling Developer Options is simple and works similarly across most Android devices, including Samsung, Xiaomi, OnePlus, Vivo, Oppo, and Pixel phones.
Step 1: Open Settings
Go to your phone’s Settings app.
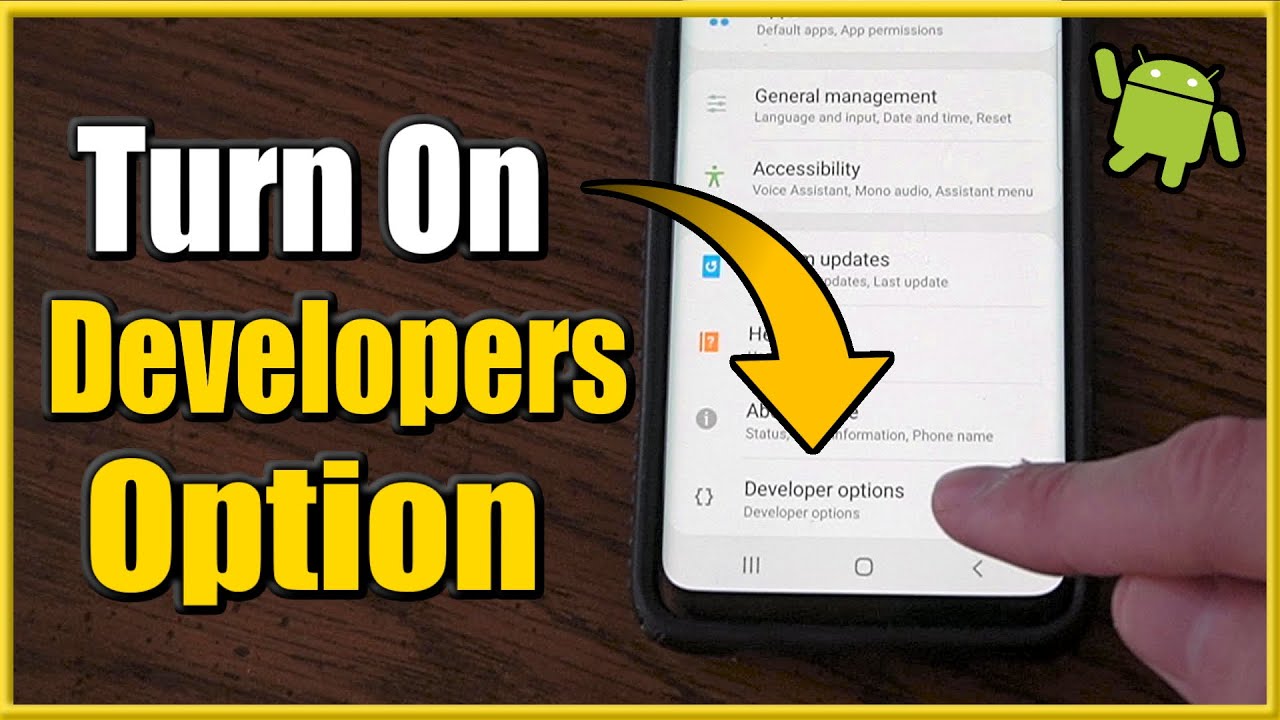
Step 2: Scroll to “About Phone”
Scroll down and tap About Phone (or About Device on some phones).
Step 3: Find “Build Number”
Locate the Build Number option. On Samsung devices, it may be under Software Information.
Step 4: Tap Build Number 7 Times
Quickly tap Build Number seven times. You may be asked to enter your phone’s PIN, password, or fingerprint.
Step 5: Developer Options Enabled
You’ll see a message saying “You are now a developer!”
Step 6: Access Developer Options
Go back to Settings → System (or Additional Settings) → Developer Options.
That’s it! Developer Options is now enabled on your Android device.
How to Enable Developer Options Safely
Just enabling Developer Options is safe. Problems arise when users change settings without understanding them. Follow these safety tips to avoid issues.
1. Only Change What You Understand
Never enable or modify options unless you know exactly what they do. Some settings affect system-level behavior and can cause crashes or data loss.
2. Avoid OEM Unlocking Unless Necessary
OEM Unlocking allows bootloader unlocking, which can void your warranty and expose your device to security risks. Enable it only if you plan to install custom ROMs.
3. Be Careful with USB Debugging
USB Debugging is useful for connecting your phone to a computer, but it can be dangerous if left enabled. Always disable it when not in use, especially in public places.
4. Don’t Force GPU Rendering Unnecessarily
Forcing GPU rendering may improve performance in some apps but can cause overheating, battery drain, or graphical glitches.
5. Avoid Background Process Limits
Limiting background processes can make apps reload frequently and reduce usability. It’s not recommended for everyday users.
Safe Developer Options Settings You Can Use
Here are some safe and commonly used Developer Options that most users can enable without risk:
Animation Scale (Recommended)
You can make your phone feel faster by reducing animation times.
- Window animation scale: 0.5x
- Transition animation scale: 0.5x
- Animator duration scale: 0.5x
This improves perceived speed without harming the system.
Stay Awake (Optional)
Keeps the screen on while charging. Useful for testing or long downloads.
USB Debugging (Temporary Use)
Enable only when needed for file transfers, ADB commands, or screen mirroring apps.
Developer Options Settings to Avoid
If you’re not an expert, avoid these settings:
- OEM Unlocking
- Mock Location App (unless testing GPS apps)
- Force 4x MSAA
- Disable HW Overlays
- System UI Tuner (on older Android versions)
These can impact security, battery life, or overall stability.
How to Disable Developer Options
If you no longer need Developer Options, you can easily turn it off.
- Go to Settings
- Open Developer Options
- Toggle the switch OFF
This hides the menu and resets most changes, improving safety.
Is Developer Options Dangerous?
Developer Options itself is not dangerous. The risk comes from misusing advanced features. As long as you:
- Avoid unknown settings
- Disable USB debugging when not needed
- Don’t unlock the bootloader casually
You can safely use Developer Options without harming your device.
Final Thoughts
Developer Options is a powerful Android feature that offers greater control and customization when used wisely. By following this guide, you now know how to enable Developer Options on Android safely, what settings are helpful, and which ones to avoid.
For more Android guides, APK downloads, and tech tutorials, keep visiting apkw8.org — your trusted source for Android knowledge.